My mother was a wonderful baker. She made homemade bread, biscuits and rolls from scratch. Unfortunately, I didn't inherit that gene. However, thanks to my mom, I'm able to make rolls, but not the way she did.
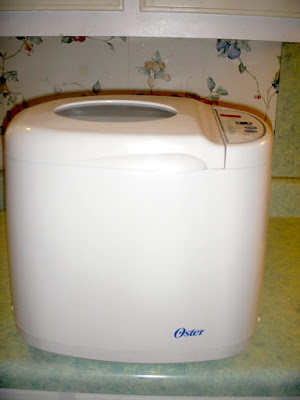
In 1999, my mother gave me a bread machine for Christmas. Thanks to this thoughtful gift, I'm able to put a basket of homemade rolls on the table every holiday and special occasion, just like my mother used to do.
One advantage of using a bread machine is the device does all the work. Once the ingredients are added and the machine turned on, the mixing, kneading, rising and, if you're making a loaf of bread, baking are all done for you.
Bread machines have a variety of settings, such as basic, French, sweet and whole wheat to name a few. You can also adjust the color of the loaf from light to medium to dark. I hate to admit I've never used any of those settings. In fact, I've never used my bread machine to make a loaf of bread. The only setting I ever use is the dough/pasta setting.
The dough/pasta setting mixes and kneads the roll ingredients and allows them to rise in a draft free environment. Once the dough is ready, all I have to do is shape the rolls, let them rise again and bake them in the oven.
Although the rolls I make are called One Hour Buttermilk Rolls, it definitely takes longer than an hour to make them in a bread machine. I don't mind, though, since this gives me time to do other things.
If you want to make these rolls in a bread machine, make sure to follow the directions for your particular model. Most machines require the ingredients to be placed in the pan in a certain order. Sometimes the ingredients also need to be at room temperature. If you're not sure, check the user's guide.
If you don't have a bread machine or want to make the rolls in less time, I'm also including the directions that came with the recipe. I've never made the rolls this way, but a friend did and she said they came out perfect.
Regardless of the method used, there's two important things to keep in mind concerning the ingredients. First, as the name implies, the recipe uses buttermilk. I don't recommend substituting regular milk because buttermilk makes baked goods tender.
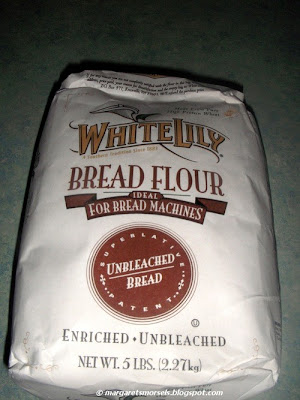
Second, the recipe calls for all-purpose flour. I recommend substituting bread flour. Bread flour, which can also be used in a bread machine, is made from hard wheat making it ideal for baked yeast goods such as rolls.
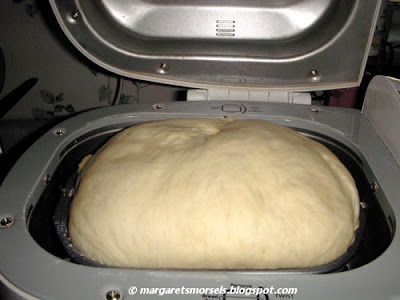
Once the dough/pasta cycle is done, let the dough stay in the machine an additional 30 minutes. The dough will continue to rise which makes the baked rolls extremely tender.
The dough at the end of the dough/pasta cycle.
After you remove the dough from the bread machine, knead it a couple of times on an unfloured bread board. You can make the rolls into any shape, but I make them into cloverleaf rolls.
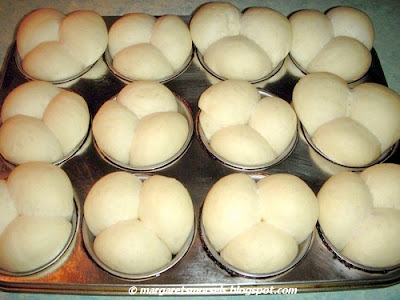
To make cloverleaf rolls, divide the dough into 18 equal pieces; divide each piece into 3 pieces. Roll each piece into a ball. Put three balls in each greased muffin cup. The rolls are prettier when I roll the dough on the bread board with the palm of my hand instead of rolling it between my palms.
Once the rolls have been shaped, cover the pans with a clean towel and put them in a warm place free from drafts. I put the pans on top of the dryer. If the rolls don't rise enough, I turn the dryer on to help speed up the process. Once the rolls have doubled in bulk, put them in the oven and bake them for 15 to 18 minutes.
The recipe only makes 18 rolls so, if I'm cooking for a crowd, I make two batches. I make one the day before, the other the day of the dinner. You can serve the first batch at room temperature, but they're better reheated. To reheat the rolls, put them on a cookie sheet. Cover the pan with foil -- you don't want the tops to get any browner -- and put them in a 350° oven for 10 to 15 minutes or until heated through.
There's nothing like the smell -- and taste -- of freshly baked bread. The rolls may be the last thing to come out of the oven, but they're the first thing to disappear off the table.
One Hour Buttermilk Rolls
18 Servings
2 (1/4 oz.) pkg. active dry yeast
1/4 cup very warm water (115° to 120°)
1 1/2 cups buttermilk (at room temperature)
1/2 cup vegetable shortening
3 Tbsp. sugar
1 1/2 tsp. salt
1/2 tsp. baking soda
4 1/2 cups all-purpose flour (I use bread flour)
BREAD MACHINE DIRECTIONS: Put the ingredients in the pan in the order and temperature listed by the manufacturer. Close the lid and turn the machine on the dough/pasta cycle. When done, let the rolls rise in the machine an additional 30 minutes.
Remove dough and knead a couple of times on an unfloured bread board. Shape rolls into the desired shape and place in greased muffin cups. Cover with a towel and put in a warm draft free place to rise until doubled in bulk. Bake at 400° for 15 to 18 minutes or until golden.
TO MAKE WITHOUT A BREAD MACHINE: In a bowl, stir yeast into warm water until dissolved. Stir in next 5 ingredients until combined (mixture will be lumpy). Stir in flour, 1 cup at a time, until soft dough forms.
Turn dough out onto lightly floured surface; knead until smooth and elastic, 8 minutes. Let stand 10 minutes. Shape rolls into the desired shape and place in greased muffin cups. Cover with a towel and put in a warm draft free place to rise until doubled in bulk. Bake at 400° for 15 to 18 minutes or until golden.
© Margaret's Morsels


So now I have to try this. I have a bread machine. And have always wondered how to make the cute little clover leaf rolls. I will try this and get back to everyone. Baking is SO NOT my thing. If I can pull it off, anyone can! And I feel certain I can pull this off. This makes it look so simple. Now can you help me figure out how to make "challah" the simple way?? That one is still giving me migraines!
ReplyDeleteI don't know why you couldn't make challah in the bread machine with the dough/pasta cycle. When the cycle is done, remove the bread, shape it, let it rise and bake it according to the directions. Let me know if this works.
ReplyDelete